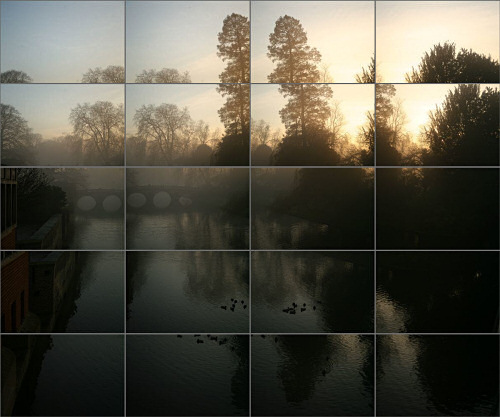
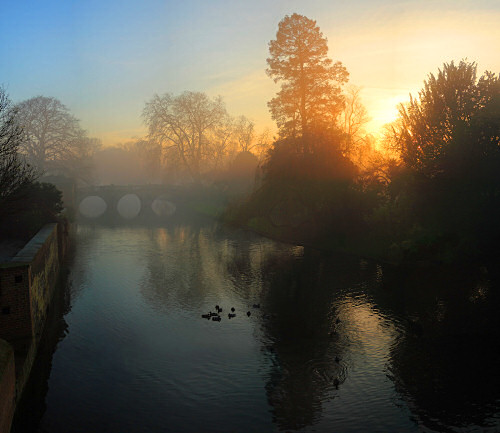
The first step in creating a photostitch is to take the photographs. For this photostitch (The River Cam in the Mist at Magic Hour), I wanted to create as large an image as possible, so set my camera to maximum zoom – this would lead to more photographs being required to cover the subject matter. I then fixed the camera’s shutter speed, aperture, focus, and white balance, to ensure that all photos in the series look as similar as possible in colour and exposure. A row of photos was taken along the top of a mental grid, and then the next row down etc. until the whole scene had been covered. Photostitching requires overlap between each column and row of photos, so that the images can be lined up accurately.
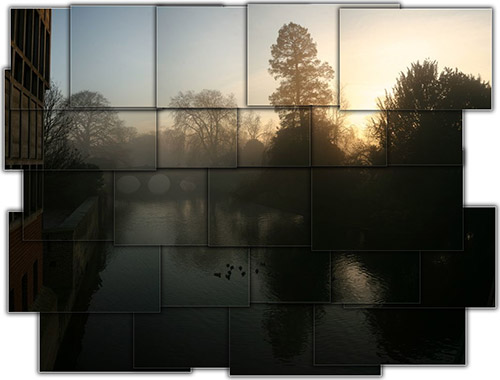
The next step uses software to calculate how the images overlap, and to find control points that appear in more than one photograph. Depending on the output options, the resulting image(s) may still have very visible seams where the source photos overlap – this is most often due to vignetting, where the corners of a photograph are dimmer than the centre. While it is sometimes possible to get a near-perfect image straight from the software, I tend to choose to output a multi-layered Photoshop file, and then carefully blend between the layers so that no seams are visible; this is what can take many hours, even after creating control points and working in the photostitch software.
I think you’ll find that the results are well worth it though. 23 photos and 5+ hours later, here’s the 81 megapixel image.
Move your mouse over the image to see a crop of the full-resolution image.